Add Users Individually: Overview
Use the Add Users screen to individually add a user to TOMS by entering the user’s information and email address, assigning the user a role, and then confirming and saving the new user’s information. Select the [Users] navigation tab from the top navigation bar, and then select the [Add] action tab to open the Add Users screen (figure 1).
LEA coordinators can add the user roles of site coordinator and lower in the hierarchy than their own. Site coordinators can add users’ roles lower than site coordinator, such as test administrator, test examiner, and so forth. To assign more than one role to a user, repeat the steps included under Detailed Instructions.

Figure 1. Add Users navigation
- User Name and Contact Information—Enter the user’s information and email address.
- Assign a Role—Select the user’s organization, role, and test administration year(s).
- Confirm and Save User Information—Confirm and save the new user’s information and role.
Quick Instructions
- Enter the user’s name and contact information on the User Name and Contact Information progress step. Be sure to enter all required fields.
- Select the [Next] button to proceed to the next step.
- Select the organization before selecting the role.
- The user is assigned the role for each test administration year selected and is required to sign a Test Security Agreement (coordinators only) and a Test Security Affidavit (all users) upon logging on to TOMS for the first time after the role assignment is made.
- After selecting the test administration year(s), if available, for the new user, select the [Next] button to move to the Confirm and Save User progress step.
- Select the [Clear] button to clear all fields and start again.
- If all the information is correct, save it by selecting the [Save] button.
Detailed Instructions
Follow these steps to add an individual new TOMS user.
I. User Name and Contact Information
- Enter the user’s name and contact information on the User Name and Contact Information progress step (figure 2). Be sure to enter all required fields.
- After all the fields have been entered, either (1) select the [Next] button to proceed to the next step; or (2) select the [Clear] button to clear the information and start again.
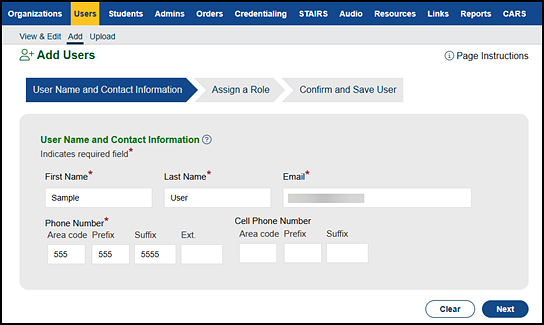
Figure 2. User Name and Contact Information progress step
II. Assign a Role
Select the organization, and then select the role at that organization for the new user (figure 3).
- Select the organization before selecting the role.
- Select the role to be assigned to the user. (The user is required to sign a Test Security Agreement [coordinators only] and a Test Security Affidavit [all users] upon logging on to TOMS for the first time after the role assignment is made.)
-
Select the [Next] button to move to the Confirm and Save User progress step.
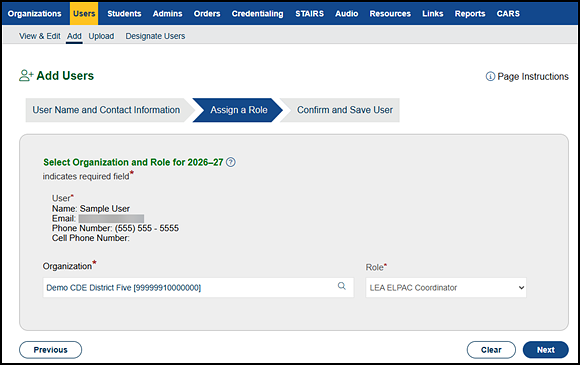
Figure 3. Assign a Role progress step
III. Confirm and Save User Information
- The Confirm and Save User progress step (figure 4) displays the information entered for the new user, including name, email address, phone number, cell phone number, organization, and assigned role.
- If all the information is correct, save it by selecting the [Save] button.
- Otherwise, to return to the previous progress step to make edits, select the [Previous] button.
- After the [Save] button is selected, a confirmation message is displayed (figure 5).
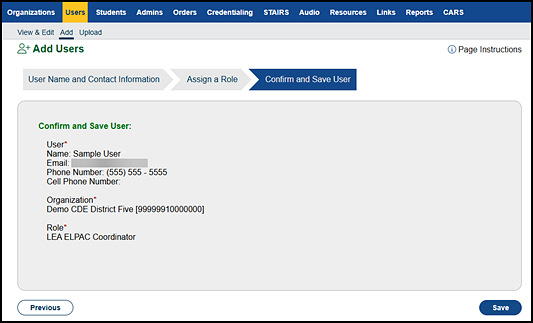
Figure 4. Confirm and Save User progress step
-
To close the confirmation message, select the [Close] button.
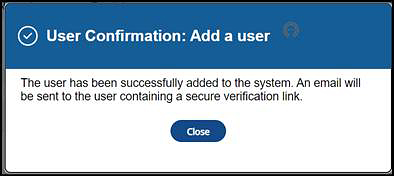
Figure 5. User Confirmation—Add a User message box
After this message box is closed, the User Name and Contact Information progress step displays the information just entered for the new user.
To assign more than one role to a user, repeat the steps included under Detailed Instructions.