Entering Responses into the DEI
Refer to the Features of the Student Testing Application section of the CAASPP Online Test Administration Manual for more information about using the tools in the DEI.
Review the Access, Logons, and Passwords chapter of the TOMS User Guide for instructions on gaining access to TOMS and setting and resetting passwords for the California assessment systems.
Administration of Smarter Balanced Summative Assessments and CAST is described in previous chapters of this manual.
Logging On to the DEI
- Use an internet browser to navigate to the CAASPP & ELPAC Website.
- Select the System Links menu.
- Select the DEI—Data Entry Interface item from the drop-down list.
-
On the user Logon screen, after entering the user’s TOMS username, which is the user’s email address, and password, select the [Secure Logon] button (refer to figure 1).

Figure 1. DEI Logon screen
Enter Logon Information for the Student Being Tested
After logging on to the DEI, the Enter Student Information screen, shown in figure 2, appears. Enter the logon information for the student being tested.
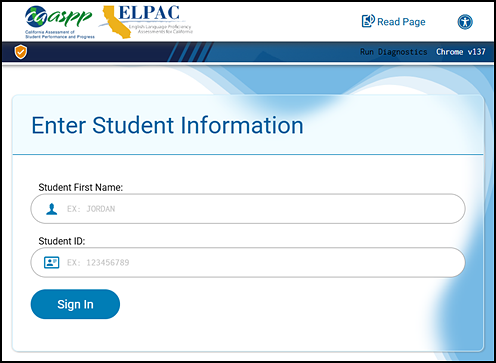
Figure 2. Enter Student Information screen
To enter a student’s information, complete the following steps:
- In the Student First Name field, enter the student’s first name as it exists in TOMS.
- In the Student ID field, enter the student’s SSID.
- Select [Sign In].
Verify Student Information
After a student’s information has been entered, the Is This the Student? screen appears (figure 3).
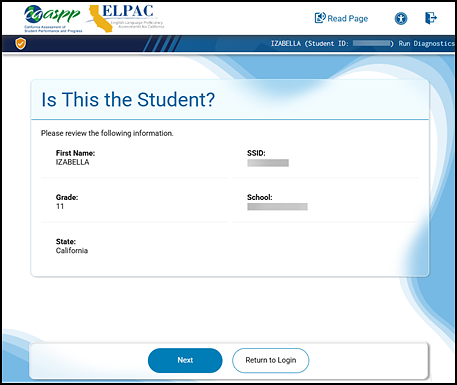
Figure 3. Is This the Student? screen
- Review the following information that appears on this screen:
- First Name
- SSID
- Grade
- School
- State
- If all of the student’s information is correct, select the [Next] button. If any of the information is incorrect, select the [Return to Login] button and do not proceed with the data entry for this student. Instead, notify the site CAASPP coordinator that the student’s information is incorrect. Data entry cannot begin until this information is corrected.
-
To display the assessment or assessments available for data entry on the Available Tests screen, first select the test group to reveal a specific assessment or assessment; in figure 4, this is “Smarter Balanced Summative Assessments - Paper Data Entry.” Then, select the assessment name.
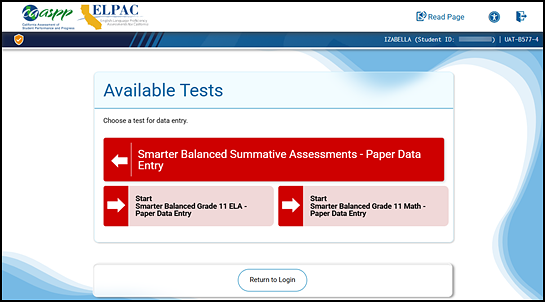
Figure 4. Available Tests screen
The Available Tests screen (figure 4) displays the assessments assigned to the student:
- An eligible student—to whom a PPT has been assigned—in grades three through eight or grade eleven will show ELA and mathematics assessments available for data entry.
- An eligible student in grade five or eight will also show CAST available for data entry.
- An eligible student in grade eleven might also show CAST available for data entry.
- An eligible student in grade ten or twelve will show only CAST available for data entry.
- An eligible student may also have an ELPAC test group.
What follows are the possible assessment statuses that appear before the assessment name at the top of the button for a content-area assessment:
- “Start” indicates a start to data entry for an assessment.
- “Resume” indicates a resumption of data entry for an assessment.
- “Inactive” indicates that student responses have already been entered for an assessment.
-
The next screen that appears, the Instructions and Help screen, shown in figure 5, is the same as the one used by a student taking a computer-based assessment.
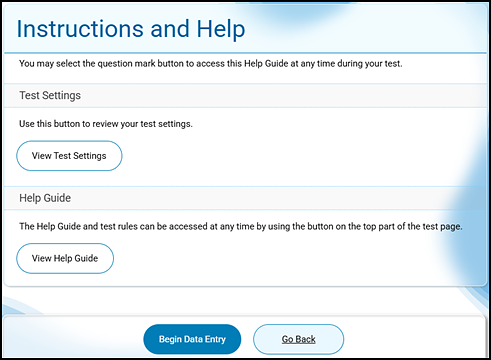
Figure 5. Instructions and Help screen
- Select the [View Test Settings] button to review the test settings used by the student and assigned in TOMS. Note that these cannot be changed in the DEI.
- Select the [View Help Guide] button for an overview of the buttons the user will encounter in the DEI; these are the same buttons and tools that a student encounters in the TDS. The guide is available on all screens by selecting the [Help] question mark [?] button in the top-right corner of any screen.
- Select the [Begin Data Entry] button to enter the responses found in the student’s answer booklet or select [Go Back] to return to the Available Tests screen.
Guidelines for Response Entry
General Test Rules and Navigation
- Responses must be entered and submitted within five days of when the student finished testing.
- All responses must be entered before the end of the LEA’s selected testing window.
- Questions are reviewable before submitting the assessment.
- Selected responses for questions are changeable only if the assessment has not been submitted for scoring.
- If any of the responses have been skipped—as indicated by a red triangle on the Data Entry Summary screen—return to those sections in the answer booklet to confirm student responses.
- If the student forgot or failed to enter a response in the answer booklet, then the response should be left blank in the DEI.
- If a response was not entered into the DEI because of user error, enter the missing information from the answer booklet before the assessment is submitted.
- Data entry may be paused and resumed at a later time, so long as resumption is both within five days of when the student finished testing and before the end of the LEA’s selected testing window.
- If an item response was skipped unintentionally and the assessment was mistakenly submitted for scoring, the LEA CAASPP coordinator or site CAASPP coordinator should file a STAIRS case to reopen the assessment in the DEI so the responses can be entered. Refer to the Security Incidents and Appeals Procedure Guide for steps on submitting this Appeal.
Layout of the Answer Booklet Versus Layout of the DEI
The response options in the DEI may be labeled differently than in the answer booklets. Keep the following guidelines in mind when entering student responses:
-
When entering the student’s responses, there are questions with multiple-choice, multiple-select response options that are marked by the student in the answer booklet by marking the circles with the letters that correspond to the answer options. These answer options are presented as checkboxes in the DEI. The order of checkboxes corresponds with the letter options from top to bottom, as shown in table 1.
Table 1. Order of Option Entry
Answer Booklet DEI A
□
B
□
C
□
D
□
- There may also be instances where there are questions with multiple-choice, single-correct responses in the answer booklet where the response selection is A, B, C, or D, but in the DEI, the student’s response has to be selected from the body of the on‑screen text by dragging the cursor over text, for example.
- A matching item question appears as A, B, C, or D responses in the answer booklet but as checkboxes in the DEI. The options will correspond from top to bottom and left to right to enter the response.
- In Session 3 for ELA or mathematics, the responses in the answer booklet start at number 1, whereas the first number in the DEI for Session 3 continues numbering from the previous section (Session 2).
- Enter any and all checkbox selections the student marked in the answer booklet, even if that number is less than the number called for in the test question. If a student responded with greater than the number of requested responses, have the student review the responses to that question and erase however many responses it takes to get to the number requested by the question. However, for CAST, the DEI will allow only the number of responses requested in the test question.
Interpreting Constructed Responses
- Constructed-response sections must be entered verbatim. Student responses must not be corrected or otherwise altered, including spelling and grammar. Only the first 20,000 characters of a response, including spaces, may be entered.
- Use the text response formatting tools only if such formatting, such as an underline, was included in the student’s response.
Proceed Through the Assessment
Enter student response data for each required question on a page before proceeding to the next page in the assessment.
Navigating to Questions
Navigate to questions page by page or by jumping directly to a question page.
-
To navigate page by page, select the [Back] or [Next] buttons at the top of the screen. These are indicated in figure 6.
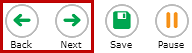
Figure 6. [Back] and [Next] buttons
-
To return to a page with a specific question, select the appropriate question from the Questions screen, which is shown in figure 7.
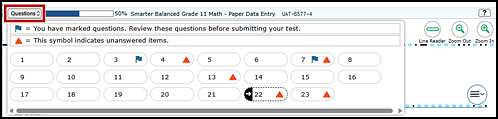
Figure 7. Questions screen
-
To flag a test question, select Mark for Review—the second selection—from the context menu above and to the right of the test question on the screen (figure 8).
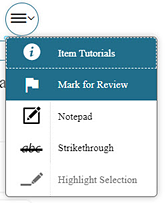
Figure 8. Context menu with Mark for Review option selected
End the Assessment
- On the screen for the last question, select the [Next] button (outlined with a box in red) in the top-left corner of the screen (refer to figure 6).
-
The Data Entry Summary screen, shown in figure 9, provides DEI users the final chance to enter responses—it will show any questions that did not have a response entered—or edit the responses entered for a student (if, for example, text in an essay response was not underlined like the student did when the student handwrote it).
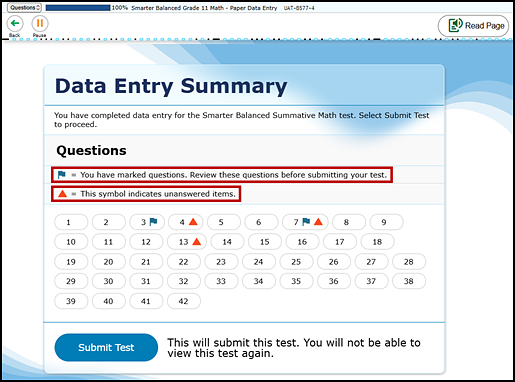
Figure 9. Data Entry Summary screen
- Select the number associated with a test question to return to that question to edit the student’s work that had been entered.
-
Select the number associated with a flagged test question. A flag symbol, such as the one in figure 10, appears next to the question number when a question is flagged.

Figure 10. Flagged test question
-
The triangle next to a question number indicates an unanswered question (figure 11). Select a question number with the triangle symbol to go back to that question to assign the missing response. Refer to the response in the student answer book to verify that all responses were entered correctly. If the user or student forgot or failed to mark a response, respectively, in the answer book, then the response should be left blank in the DEI.

Figure 11. Unanswered test question
- Once responses have been entered for a grade eleven student, a response to the EAP option must be entered.
-
Scroll down from the top of the Data Entry Summary screen. The bottom section, the “EAP Release and Instructions” section (figure 12), appears.
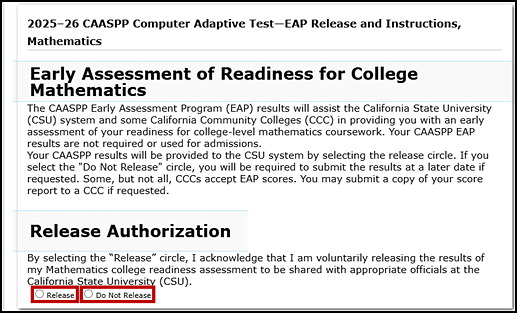
Figure 12. “EAP Release and Instructions” section
-
Locate the Authorization to Release Results box on the front of the grade eleven student answer booklet. This box is indicated in figure 13.
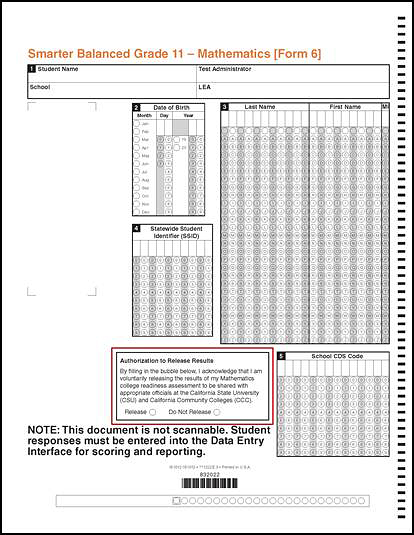
Figure 13. Front page of the grade eleven answer booklet for mathematics
- Select the radio button corresponding with the option the student marked on the answer booklet, as shown in figure 12. The student’s choices were Release and Do Not Release.
- Because a response is required, an error message will appear if student responses are submitted without selecting one of the two radio buttons. If the student did not choose either of the options on the answer booklet, then select Do Not Release.
-
-
Once all responses have been entered, select the [Submit Test] button. A message box, like the one shown in figure 14, pops up to advise that responses have been entered for all test items.
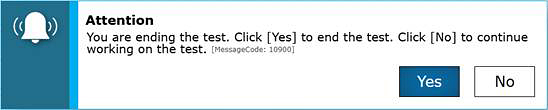
Figure 14. Attention message box (finished entering responses)
- Select [Yes], which means the responses entered cannot be changed.
-
After selecting the [Yes] button, the Test Submission Record screen will indicate that the assessment has been submitted (refer to figure 15).
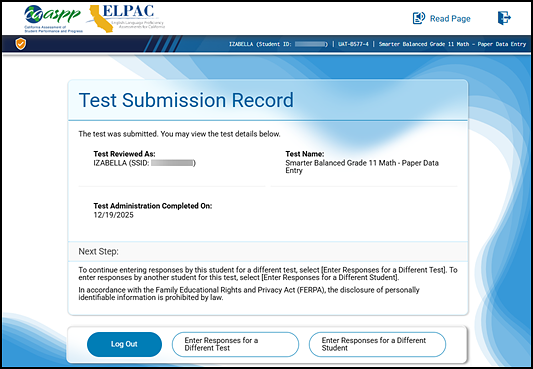
Figure 15. Test Submission Record screen
- Select one of the following buttons at the bottom of the screen:
- [Log Out] button—Exit the DEI.
- [Enter Responses for a Different Test] button—Enter responses for a different assessment (if there are more associated assessments for the student).
- [Enter Responses for a Different Student] button—Return to the Logon screen to start the process over for a new student.